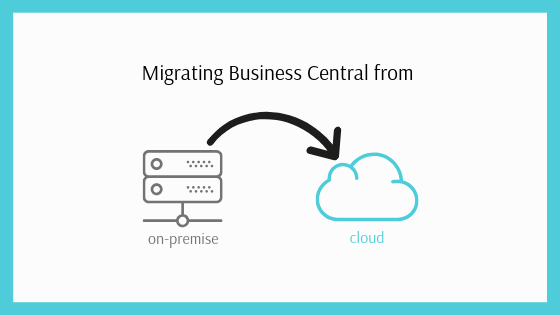
How to migrate Business Central from on-premise to cloud using extensions?

While Business Central is a cloud-first service, many customers who need to run their workloads fully on-premises or on the intelligent edge connected to the cloud can also have access to the scenarios such as KPI that are based on machine learning or the data you have in Power BI.
To stay on-premise or to move your data completely on cloud is totally your decision. But, if you are interested in the cloud experience then we are here to guide you.
When you move your data from locally deployed Business Central to the cloud, as a result, your data is replicated to the cloud for an intelligent cloud scenario.
intelligent cloud Business central on premise to on cloud

Things to remember when planning an on-premise to cloud migration for Business Central:
  1. Before setting up the connection to the intelligent cloud, ensure that at least one user in the system that has SUPER permissions. This will be the only user to make changes in the Business Central tenant.
  2. The amount of data that can be replicated for any tenant is limited to 150 GB. However, if your database is larger than 150 GB, try reducing the number of companies you are replicating data for. (Current Limitation)
  3. SQL Business Central on Premises Database Compatibility Level: 130
Here is the step-by-step instruction to follow:

1 – Business Central on Cloud – Assisted Setup

assisted setup

2 – Setup Intelligent Cloud


Setup Intelligent Cloud Business central on premise to on cloud

3 – Intelligent Cloud Setup


Intelligent Cloud Setup

4 – Replicate Data From Business Central


Replicate Data From

5 – SQL Database Connection

Server={SQL Server Name};Database={Database Name};User Id={SQL Server Authenticated UserName};Password={SQL Server Authenticated Password};
Server=SERVER01\SQLSERVER2016; Database=Base DB BC Spring 2019 Build 29530 Cloud;User Id=sa;Password=xxxx;

SQL Database Connection

6 – Self Hosted Integration Run-time

  • Copy the Authentication Key in Notepad to use it in later steps.
  • Download and install Self Hosted Integration Run-time from the link in the screenshot.
  • Complete Steps 7, 8, 9 and 10 before clicking Next in Step 6.
  • After clicking Next in Step 6 Go-to Step 11.


Self Host Integration runtime

7 – Install Microsoft Integration Run-time


Install Self Host Integration Runtime

8 – Authentication Key – Register


Authentication Key Register

9 – Integration Run-time Registered Successfully


Integration Runtime Registered Successfully Business central on premise to on cloud

10 – Integration Run-time Configuration Manager


Integration Runtime Configuration Manager Business central on premise to on cloud

11 – Replicate Companies from Business Central On-Premises


Replicate Companies from Business Central OnPrem

12 – Schedule Replication


Schedule Replication

13 – Intelligent Cloud Setup Completed


Intelligent Cloud Setup Completed

14 – Setup Intelligent Cloud Completed


Setup Intelligent Cloud Completed Business central on premise to on cloud

15 – Replication Initialization Completed


Replication Initialization completed

16 – Company CRONUS Canada, Inc. – Created Successfully – On Cloud

Cronus Canada Company Created - On Cloud

17 – Intelligent Cloud Management – Run Replication Now

This process would replicate data from Business Central On-Premises to Business Central On Cloud.


Run Replication Now

18 – Replication Triggered Successfully


Replication Triggered Successfully

19 – Replication Results


Replication Results

20 – Replication Statistics

Replication Statistics

21 – Replication Status Information
Data Replicated Successfully.

Replication status Information

22 – Extension – Business Central On-Premises – Item Table

Now we have created a simple Extension extending Item Table and created a new Custom Table in On-Premises Environment. We have a sample data for same in On-Premises Environment.

Extension - On Prem - Item Table Business central on premise to on cloud

23 – Extension – Business Central On-Premises – Custom – Intelligent Cloud Table

Extension - On Prem - Custom Table Business central on premise to on cloud

24 – Extension – Business Central – On Cloud

We have installed the same Extension created above in Business Central On Cloud Environment.

Extension On Cloud Business central on premise to on cloud

25 – Run Replication – On Cloud

Now as the same Extension is installed in Business Central On-Premises and Business Central On Cloud, this process would replicate data for the same.

Run Replication - On Cloud

26 – Replication Completed Successfully

Replication Completed Successfully

27 – Data – Item Table – Business Central On Cloud

Data - On Cloud - Item Table

28 – Data – Custom Intelligent Cloud Table – Business Central On Cloud

Data - On Cloud - custom Table Business central on premise to on cloud

This is it! You have successfully migrated your data to Cloud. If you still have the questions or confusion then feel  free to reach out to us at sales@intech-systems.com

*This blog was originally posted here.
**Reference: https://docs.microsoft.com/en-us/dynamics365/business-central/dev-itpro/administration/about-intelligent-edge

Data Upgrade from NAV 2013 to NAV 2018 CU5

In this blog, we will discuss about Data Upgrade from NAV 2013 to NAV 2018 CU5 (Build 21836).

Task 1: Prepare the old database

1) Use the Microsoft Dynamics NAV 2013 Development Environment to build all application objects

Build Server Application Objects

2) Unlock all application objects
Filter – Locked True in object designer.
Select all Locked Objects and From File Select Force Unlock.
3) Synchronize the database schema by compiling all Objects

Task 2: Create a full SQL backup of the NAV 2013 database on SQL Server

Task 3: Uninstall all V1 extensions

As it is an NAV 2013 database there are no Extensions so skip this step.

Task 4: Upload the Microsoft Dynamics NAV 2018 license to the NAV 2013 database

– In the NAV 2013 development environment, on the File menu, point to Database, and then choose Alter.
– In the Alter Database window, choose Integration, and then select Save license in database.
– Restart Microsoft Dynamics NAV 2013 Server instance

Upload License

Task 5: Delete all objects except tables from the NAV 2013 database

– Select All Objects in Object Designer and Mark All Objects
– Select Tables in Object Designer, Select All and UN-mark all tables
– From View Select Marked only and select all in Object Designer
– Delete all Objects (marked Objects)

Task 6: Uninstall (optional) the old product (NAV 2013) and install the new product (NAV 2018 CU 5)

– Along with Installation of NAV 2018 CU 5, create a service for NAV 2018 CU 2
– Increase the SQL Command Time Out from 00:30:00 to 20:00:00 for both Services (One Service for NAV 2018 CU 2 and one Service for NAV 2018 CU 5)

Task 7: Clear Dynamics NAV Server instance and debugger breakpoints records from NAV 2013 database

1) Stop NAV 2013 Service
2) Using SQL Server Management Studio, open and clear the dbo.Server Instance and dbo.Debugger Breakpoint tables of the NAV 2013 database
DELETE FROM [NAV2018_TEST].[dbo].[Server Instance]
DELETE from [NAV2018_TEST].[dbo].[Debugger Breakpoint]
where NAV2018_TEST is my Databasename

Task 8: Convert the NAV 2013 database to the Microsoft Dynamics NAV 2018 CU 2 Database

– Open NAV 2018 CU 2 Developer Environment – Run as Administrator
– Open the NAV 2013 database in NAV 2018 CU 2 Development Environment
– Follow the conversion instructions
– Important: Do not run schema synchronization at this time

Task 9: Import the upgraded application objects (NAV 2018 CU 2) and upgrade toolkit objects into the converted database

– Import Merged objects from NAV 2018 CU 2 Object Merge in the database. (Select Replace all)
– Do not run table synchronization (Select Later if asked)
– Import Upgrade Toolkit Objects (Upgrade7001100.fob) in Database
– Do not run table synchronization (Select Later if asked)

Task 10: Connect a Microsoft Dynamics NAV 2018 CU 2 Server instance to the converted database

– Connect to NAV 2018 CU 2 service that we created in Task 6

Task 11: Compile all objects that are not already compiled

– Filter Objects with compiled false
– Compile objects with Synchronization Schema Later

If you get errors on the following table objects, use the Object Designer to delete the objects because they are no longer used.

Table 470 Job Queue (replaced by the Task Scheduler)
Table 824 DO Payment Connection Details
Table 825 DO Payment Connection Setup
Table 827 DO Payment Credit Card
Table 828 DO Payment Credit Card Number
Table 829 DO Payment Trans. Log Entry
Table 1510 Notification Template

When you delete following table object, in the Delete confirmation dialog box, set the Synchronize Schema option to Force.

– Test Runner Codeunits
Codeunit – 130400 – CAL Test Runner
Codeunit – 130402 – CAL Command Line Test Runner
OnBeforeTestRun – Verify parameter FunctionTestPermissions

Before Test Run

OnAfterTestRun – Verify parameter FunctionTestPermissions

After Test Run

Task 12: Run the schema synchronization on the imported objects – NAV 2018 CU 2

From Tools – Sync. Schema for all Tables – With Validation

Sync Schema With Validation


Task 13: Run the data upgrade process – NAV 2018 CU 2

– Open NAV 2018 CU 2 Development Environment as an administrator.
– On the Tools menu, choose Data Upgrade, and then choose Start and follow the instructions.
– To view the progress of the data upgrade, on the Tools menu, choose Data Upgrade, and then choose Show Progress.

Data Upgrade
Data Upgrade
(Below Tasks A to I are for NAV 2018 CU 2 ==> NAV 2018 CU 5)

Task A: Create a full SQL backup of the NAV 2018 CU 2 database on SQL Server

Task B: Stop NAV 2018 CU 2 Service

Task C: Convert the NAV 2018 CU 2 database to the Microsoft Dynamics NAV 2018 CU 5 Database

– Open NAV 2018 CU 5 Developer Environment – Run as Administrator
– Open the NAV 2018 CU 2 database in NAV 2018 CU 5 Development Environment
– Follow the conversion instructions
– Important: Do not run schema synchronization at this time

Task D: Import the upgraded application objects (NAV 2018 CU 5) into the converted database

– Import Merged objects from NAV 2018 CU 5 Object Merge in the database. (Select Replace all)
– Do not run table synchronization (Select Later if asked)
– Do not run table synchronization (Select Later if asked)

Task E: Connect a Microsoft Dynamics NAV 2018 CU 5 Server instance to the converted database

– Connect to NAV 2018 CU 5 service that we created in Task 6

Task F: Compile all objects that are not already compiled

– Filter Objects with compiled false.
– Compile objects with Synchronization Schema Later

Task G: Run the schema synchronization on the imported NAV 2018 CU 5 objects

From Tools – Sync. Schema for all Tables – With Validation

Task H: Run the data upgrade process – NAV 2018 CU 5

– Open NAV 2018 CU 5 Development Environment as an administrator.
– On the Tools menu, choose Data Upgrade, and then choose Start and follow the instructions.
– To view the progress of the data upgrade, on the Tools menu, choose Data Upgrade, and then choose Show Progress

Task I: Create a full SQL backup of the NAV 2018 CU 5 database on SQL Server

Task 14: Import upgraded permission sets and permissions by using the Roles and Permissions XML ports

Task 15: Set the language of the customer database

In the development environment, choose Tools, choose Language, and then select the language of the original customer database.

Task 16: Register client control add-ins

– To use these add-ins, they must be registered in table 2000000069 Client Add-in.

Microsoft.Dynamics.Nav.Client.BusinessChart

Microsoft.Dynamics.Nav.Client.DynamicsOnlineConnect

Microsoft.Dynamics.Nav.Client.FlowIntegration

Microsoft.Dynamics.Nav.Client.OAuthIntegration

Microsoft.Dynamics.Nav.Client.PageReady

Microsoft.Dynamics.Nav.Client.PingPong

Microsoft.Dynamics.Nav.Client.SocialListening

Microsoft.Dynamics.Nav.Client.TimelineVisualization

Microsoft.Dynamics.Nav.Client.VideoPlayer

Microsoft.Dynamics.Nav.Client.WebPageViewer

Task 17: Publish and install/upgrade extensions

Database = nav2018_test

Server Instance = nav2018_test

Database Server = NAVDB

You can find Extensions in NAV 2018 CU 5 DVD ==> ..\NAV.11.0.21836.W1.DVD\Extensions\

My Folder Path = C:\Prerequisites\Extensions\

You can download Microsoft_Application_11.0.19738.0.app from here.

You can find ModernDev in NAV 2018 CU 5 DVD 
..\NAV.11.0.21836.W1.DVD\ModernDev\program files\Microsoft Dynamics NAV\110\Modern Development Environment

My Folder Path = C:\Prerequisites\Extensions\ModernDev

1. Open Microsoft Dynamics NAV Administration Shell – Run as Administrator

Run below commands:

Publish-NAVApp -ServerInstance nav2018_test -Path “C:\Prerequisites\Extensions\ModernDev\System.app” -PackageType SymbolsOnly

Publish-NAVApp -ServerInstance nav2018_test -Path “C:\Prerequisites\Extensions\ModernDev\Test.app” -PackageType SymbolsOnly

Publish-NAVApp -ServerInstance nav2018_test -Path “C:\Prerequisites\Extensions\ModernDev\Microsoft_Application_11.0.19738.0.app” -PackageType SymbolsOnly

2. Update Custom Setting file parameter “EnableSymbolLoadingAtServerStartup” = True

3. Restart Microsoft Dynamics NAV 2018 CU 5 Server instance

4. Generate the application symbol references for running Running C/SIDE and AL Side-by-Side

5. Open command prompt – Run as Administrator

Run below command:

cd “C:\Program Files (x86)\Microsoft Dynamics NAV\110\RoleTailored Client”

finsql.exe Command=generatesymbolreference, Database=nav2018_test, ServerName=NAVDB

Verify results after 5 minutes at location

C:\Program Files (x86)\Microsoft Dynamics NAV\110\RoleTailored Client\navcommandresult.txt

“[0] [07/07/18  3:08:25 AM] The command completed successfully in ‘268’ seconds.”

6. V1 extensions have the file type .navx. V2 extensions have the file type .app

7. Open Microsoft Dynamics NAV Administration Shell – Run as Administrator

Run below commands:

For V1 Extensions:

Publish-NAVApp -ServerInstance nav2018_test -Path “C:\Prerequisites\Extensions\Ceridian.navx”

Publish-NAVApp -ServerInstance nav2018_test -Path “C:\Prerequisites\Extensions\MSWalletPayments.navx”

Publish-NAVApp -ServerInstance nav2018_test -Path “C:\Prerequisites\Extensions\PayPalPaymentsStandard.navx”

Publish-NAVApp -ServerInstance nav2018_test -Path “C:\Prerequisites\Extensions\QuickBooksDataMigration.navx”

Publish-NAVApp -ServerInstance nav2018_test -Path “C:\Prerequisites\Extensions\QuickbooksPayrollFileImport.navx”

Publish-NAVApp -ServerInstance nav2018_test -Path “C:\Prerequisites\Extensions\SalesAndInventoryForecast.navx”

For V2 Extensions:

Publish-NAVApp -ServerInstance nav2018_test -Path “C:\Prerequisites\Extensions\C52012DataMigration.app”

Publish-NAVApp -ServerInstance nav2018_test -Path “C:\Prerequisites\Extensions\ImageAnalysis.app”

For V2 Extensions – Sync

Sync-NAVApp -ServerInstance nav2018_test -Name “C5 2012 Data Migration” -Version 1.0.21836.0

Sync-NAVApp -ServerInstance nav2018_test -Name “Image Analyzer” -Version 1.0.21836.0

Task 18: Update the Dynamics NAV Web client configuration file (navsettings.json)

If you have installed the Microsoft Dynamics NAV Web Server components, populate the navsettings.json file for the Dynamics NAV Web Server instance with the settings of the NAV 2013 web.config file.

NAV 2013 – web.config file

NAV 2018 CU 5 – NAVSettings.JSON file

Task 19: Delete the upgrade objects

– At this point, we have upgraded the database to Microsoft Dynamics NAV 2018 CU 5.

– Now, you can delete the upgrade code units and upgrade table objects that you imported in task 9. This task is recommended but not required.

– Filter Objects with Version Tag – UPGTK11.00.00 and delete objects with Force

Here are the Microsoft blogs you can refer: Data Upgrade and Upgrading to Dynamics NAV

Was this helpful? Let us know in comments. You can get more such insights into NAV here.

For further queries, contact us.

Dynamics NAV Objects Permissions Limit

Did you know Dynamics NAV Objects Permissions have a defining limit? Yes, they do. You can define a maximum 80 Tables permissions in Object Permissions.

dynamics nav Objects Permissions

If you (a Developer) try to define more than 80 Tables in Object Permissions, you will get a warning “You have reached the allowed number of permissions“.
When OK button is pressed, Dynamics NAV considers only the first 80 Tables defined Object Permissions and will delete the rest.

dynamics nav Objects Permissions - error

Did you find this valuable? Let us know in comments!
For further queries, get in touch with us.

Dynamics NAV 2017: View Standard and Extension Objects Code in RTC

You can view Dynamics NAV Standard Objects Code and Extension code in RTC by following the below steps.

Prerequisite:

Code Viewer Control AddIn

 Dynamics NAV-Code Viewer Control AddIn

View Standard Objects Code in RTC

CAL Language is used in Dynamics NAV Objects. CAL is converted into C# at Compile Time. DotNet Framework then handles the converted C# code when object is ran and the appropriate result is displayed.
NAV saves this code in table 2000000071 Object Metadata.

Blob Fields:

  • User AL Code contains the C/Al code of the object.
  • User Code contains the C# code of the same object which is generated when the object is compiled.

This would also allow you to see code of objects which are not in your License range.
Create a simple Page “RTC Standard Objects Code” in NAV 2017 to see this code in RTC. Please see below snapshots for details.

1. View Standard Code Objects – C/AL

  • Select Object Type (Example – Table, Report, Codeunit, Page, Etc.)
  • Select Code Type (CAL, DotNet)
  • Enter Object Id
  • Click on Action – “View Standard Objects Code” You will see the Code in Code Tab.


2. View Standard Code Objects – DotNet

View Extension Code in RTC

Once the extension is installed for a tenant, you cannot see the objects in Developer environment. NAV stores these objects in table 2000000150 (Nav App Object Metadata).
Create a simple Page “RTC Extension Code” and “Nav App Object List” in NAV 2017 to see this code in RTC. Please see below snapshots for details.

3. NAV Installed Extensions

4. View Extension Code – C/AL

  • Select Code Type (CAL, DotNet)
  • Select Object Name from Nav APP Object List
  • Click on Action – “View Extension Code” You will see the Code in Code Tab.


5. View Extension Code – DotNet


You can download the Objects from here.
For more such tips and tricks about Dynamics NAV, check out my blog.

Upgrading to Dynamics NAV 2018: Errors and Solutions

Microsoft Dynamics NAV 2018 is here. For upgrading to Dynamics NAV 2018, follow these detailed steps given here.
There are 19 tasks to perform before your old version of Dynamics NAV is fully upgraded to this latest version.
Task 10 is to ‘Connect a Microsoft Dynamics NAV 2018 Server instance to the converted database’. After converting your database to this latest version, when you try to connect NAV 2018 service, it might stop automatically due to below reasons:

1. Page 30: Item Card -> Field: Net Invoiced Qty -> Control Id: 207

Error: Control Id 207

1 - Page 30 - Item Card - NAV 2018

Solution: Change Control Id from 207 to 1207 for field “Net Invoiced Qty.”

1 - Solution - NAV 2018

2. Page 31: Item List -> Action: Show/Hide Power BI Reports -> Id: 141

Error: Action Id 141

2 - Page 31 - Item List - NAV 2018

Solution – Change Action Id from 141 to 1141 for Action “Show/Hide Power BI Reports”

2 - Solution - NAV 2018

3. Page 50: Purchase Order -> Field: Ship-to -> Control Id: 84

Error: Control Id 84

3 - Page - 50 - Purchase Order - NAV 2018

Solution: Change Control Id from 84 to 284 for field “Ship-to”

3 - Solution - NAV 2018

These solutions will surely make your upgrade to Dynamics NAV 2018 a lot easier.
For more information about this upgrade, get in touch with us.

Multiple Values Input Box in Dynamics NAV

In Microsoft Dynamics NAV, there are many functions that help you enter data in a quick and easy way. Sometimes clients have a requirement of inputting one or more values at run-time and based on that result perform some actions. Keeping this requirement in mind, we have implemented an input box that takes multiple values as input at run-time. Here are the steps for the to create multiple values input box in Dynamics NAV:
1 – ActionEnter Rows and Columns

1_Action

2 – Multiple values Input Box

2_Input

3 – Result

3_Result

4-Code

X_Table

4_RunOnClient


For all this variables “RunOnCilent” property must be set. To set this up, following are the steps:
1 – Create Input Box as Form

5_Create Form

2 – Add Labels

6_Lables

3 – Add Text boxes

7_Textboxes

4 – Add Buttons

8_Buttons

5 – Get Results

9_Result

And its done.
This can reduce the unnecessary use of objects.
If you need any help, feel free to reach us.

    Join our mailing list for news updates, invitations, and more