
While Business Central is a cloud-first service, many customers who need to run their workloads fully on-premises or on the intelligent edge connected to the cloud can also have access to scenarios such as KPI that are based on machine learning or the data you have in Power BI.
To stay on-premise or to move your data completely to the cloud is totally your decision. But if you are interested in the cloud experience, then we are here to guide you.
When you move your data from locally deployed Business Central to the cloud, as a result, your data is replicated to the cloud for an intelligent cloud scenario.
Things to remember when planning an on-premise to cloud migration for Business Central:
- Before setting up the connection to the intelligent cloud, ensure that at least one user in the system has SUPER permissions. This will be the only user to make changes in the Business Central tenant.
- The amount of data that can be replicated for any tenant is limited to 150 GB. However, if your database is larger than 150 GB, try reducing the number of companies you are replicating data for. (Current Limitation)
- SQL Business Central on Premises Database Compatibility Level: 130
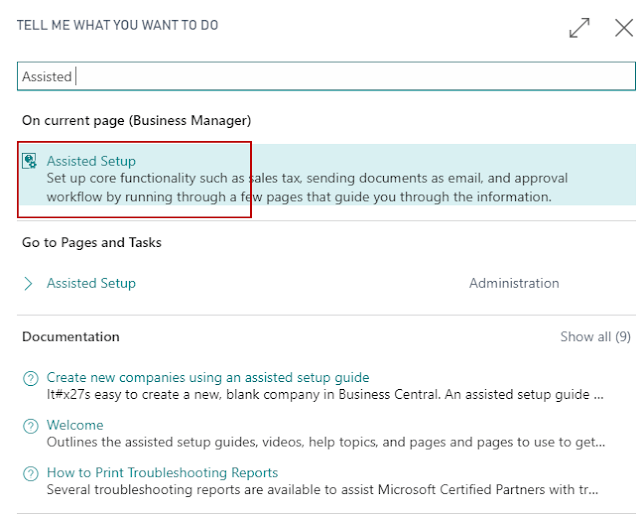
Here is the step-by-step instruction to follow:
1 – Business Central on Cloud – Assisted Setup
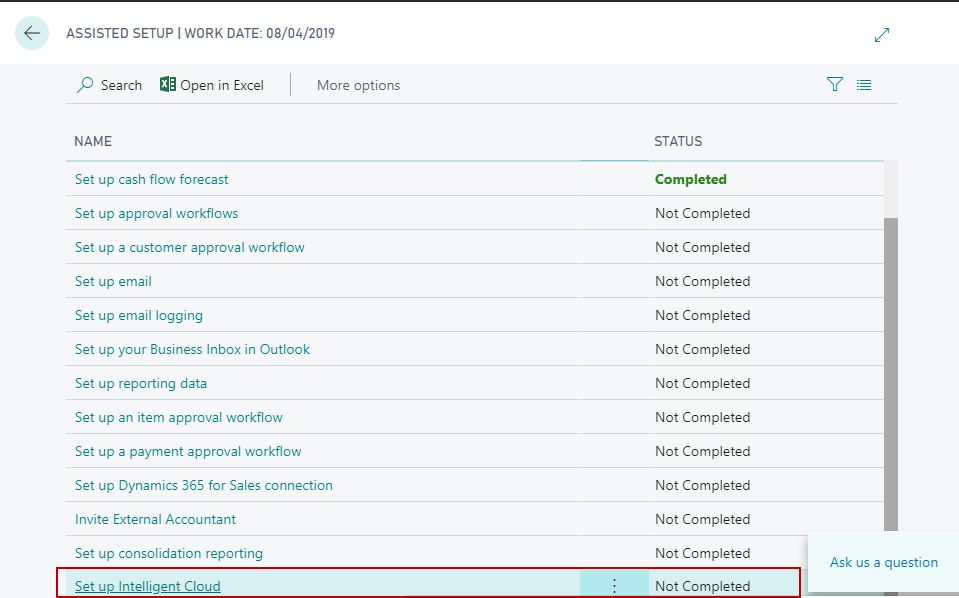
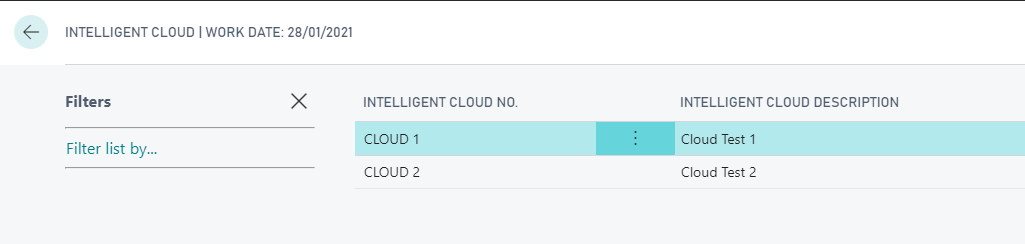
2 – Setup Intelligent Cloud
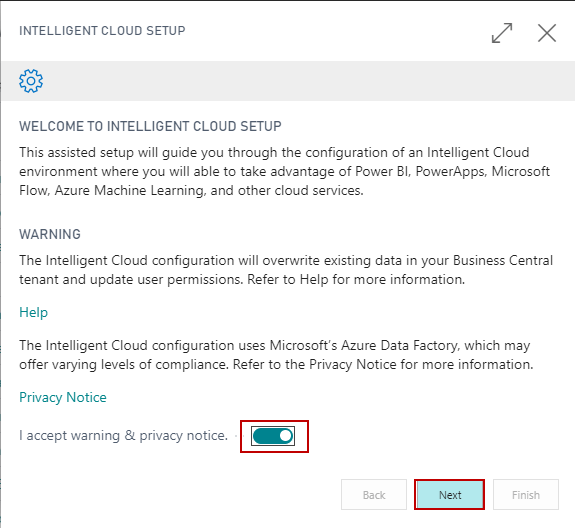
3 – Intelligent Cloud Setup
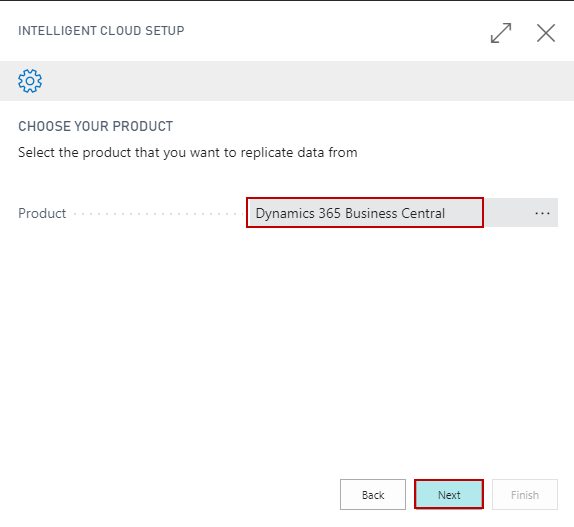
4 – Replicate Data From Business Central
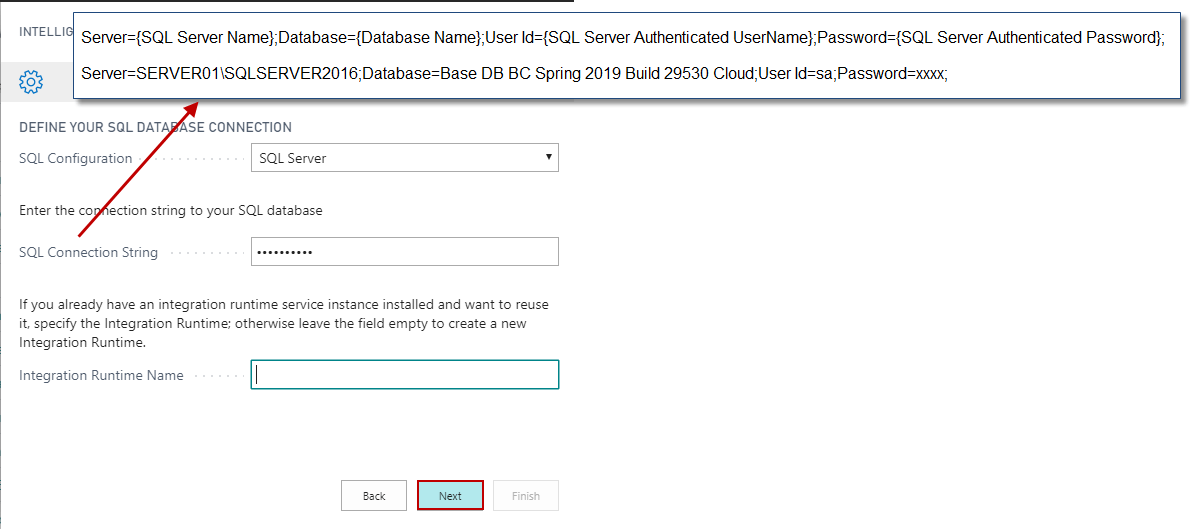
5 – SQL Database Connection
Server={SQL Server Name};Database={Database Name};User Id={SQL Server Authenticated UserName};Password={SQL Server Authenticated Password};
Server=SERVER01SQLSERVER2016; Database=Base DB BC Spring 2019 Build 29530 Cloud;User Id=sa;Password=xxxx;
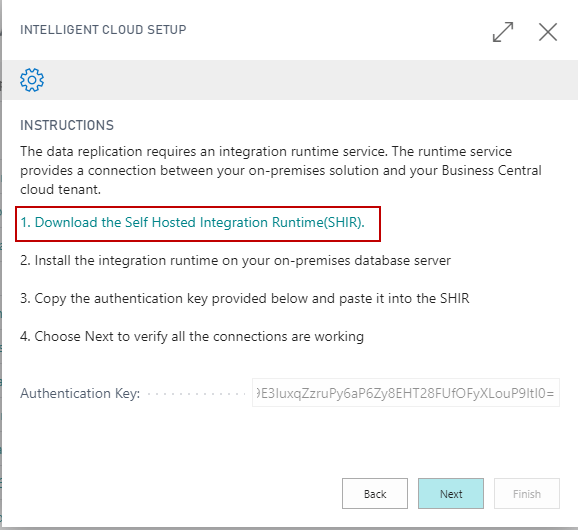
6 – Self Hosted Integration Run-time
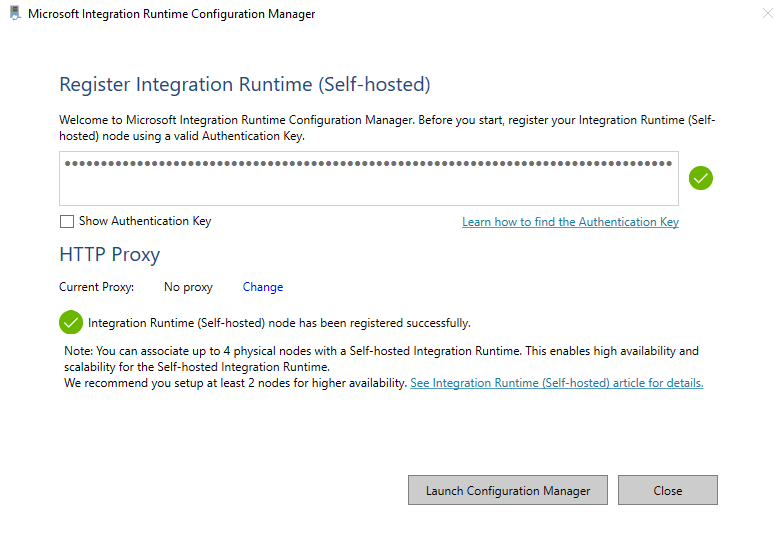
- Copy the Authentication Key in Notepad to use it in later steps.
- Download and install Self Hosted Integration Run-time from the link in the screenshot.
- Complete Steps 7, 8, 9 and 10 before clicking Next in Step 6.
- After clicking Next in Step 6 Go-to Step 11.
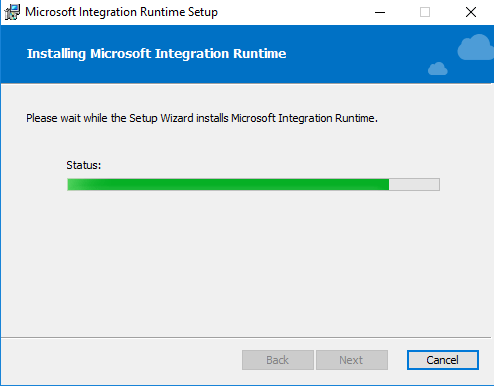
7 – Install Microsoft Integration Run-time
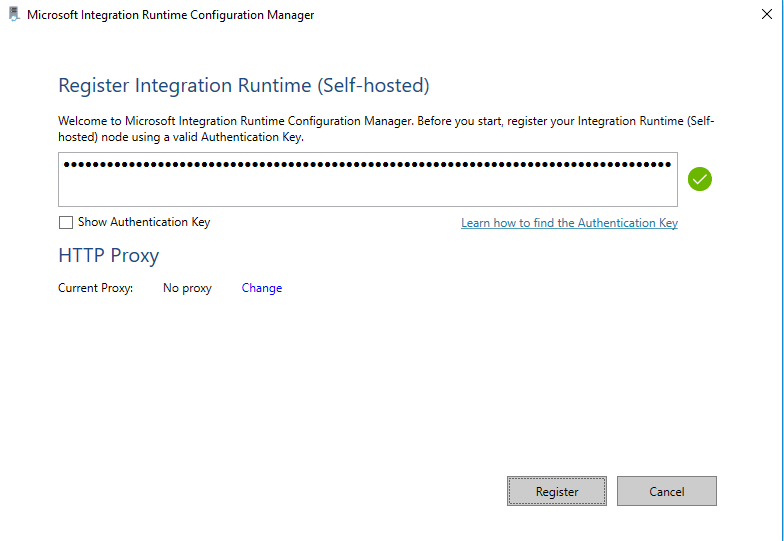
8 – Authentication Key – Register
9 – Integration Run-time Registered Successfully
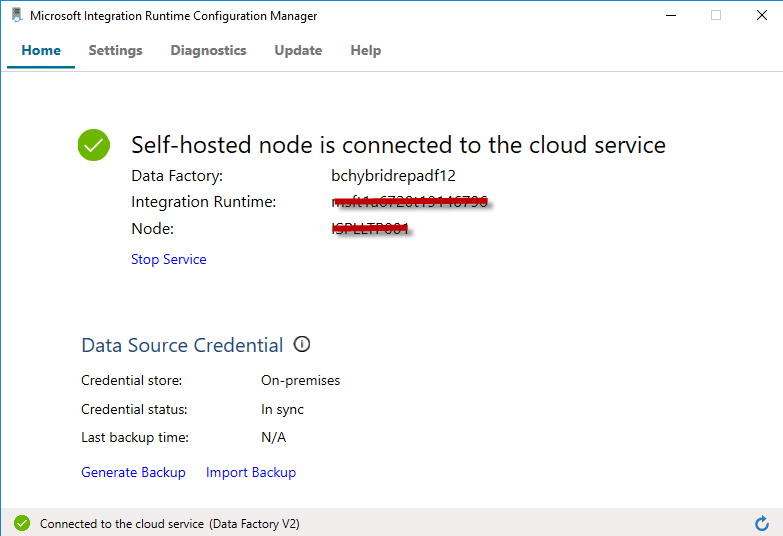
10 – Integration Run-time Configuration Manager
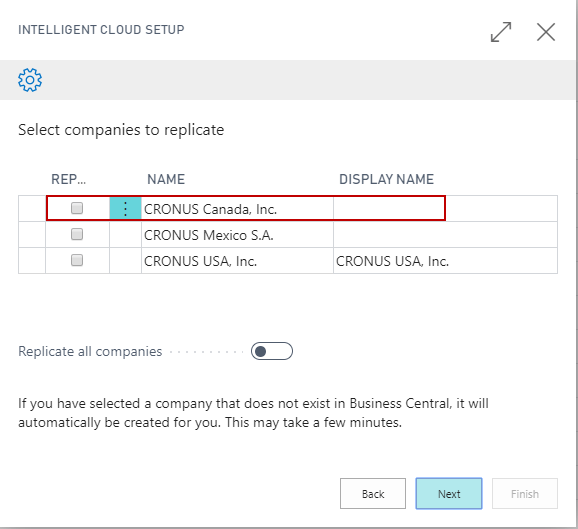
11 – Replicate Companies from Business Central On-Premises
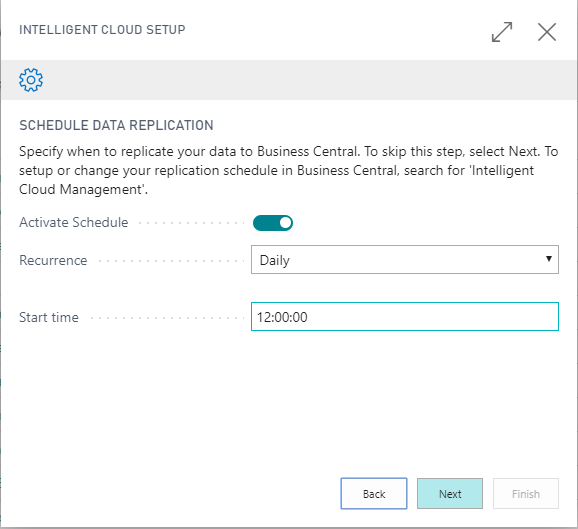
12 – Schedule Replication
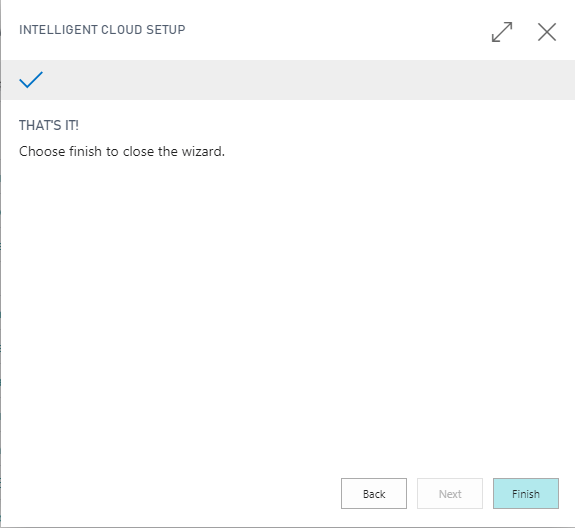
13 – Intelligent Cloud Setup Completed
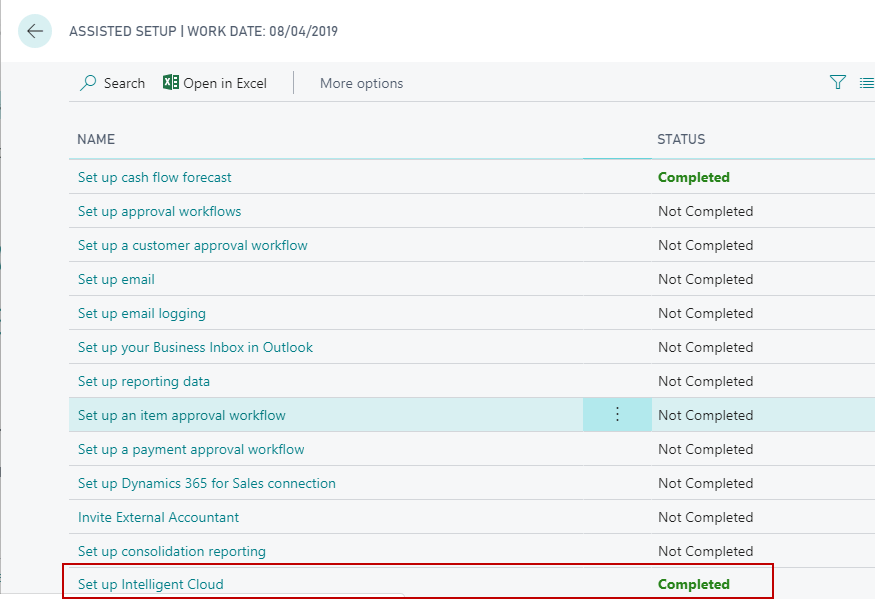
14 – Setup Intelligent Cloud Completed
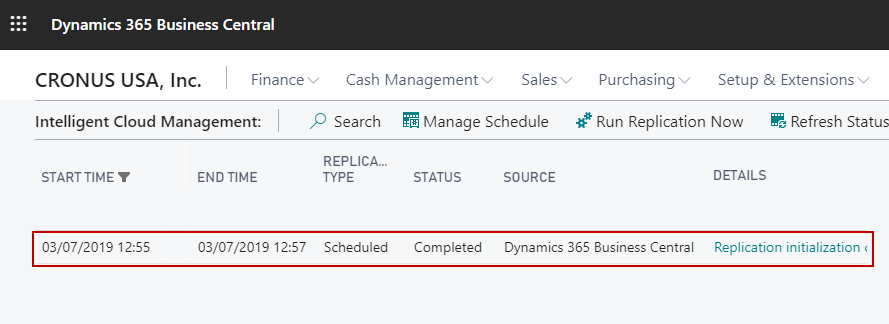
15 – Replication Initialization Completed
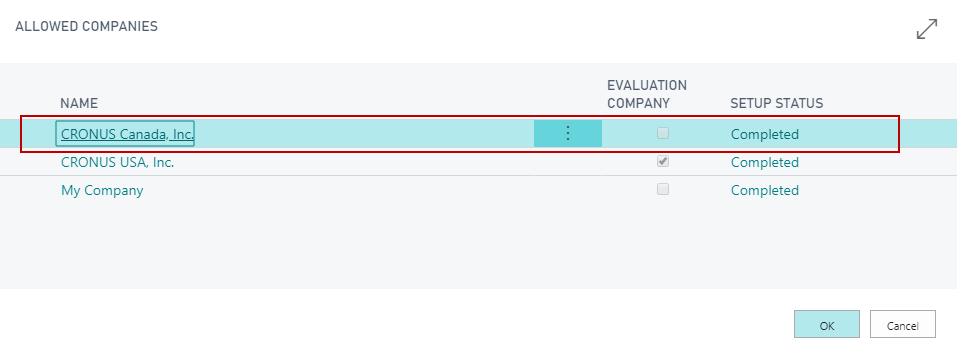
16 – Company CRONUS Canada, Inc. – Created Successfully – On Cloud
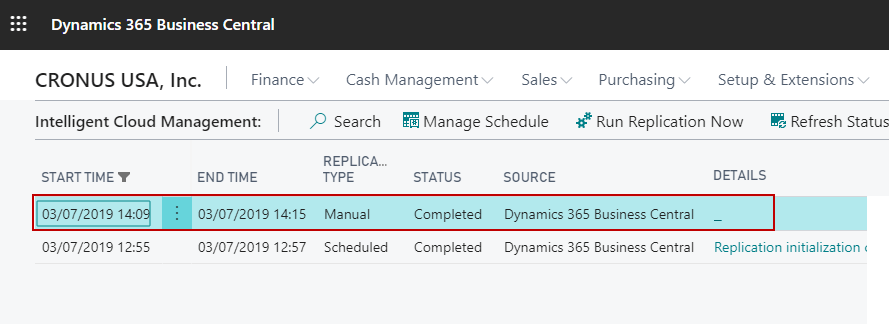
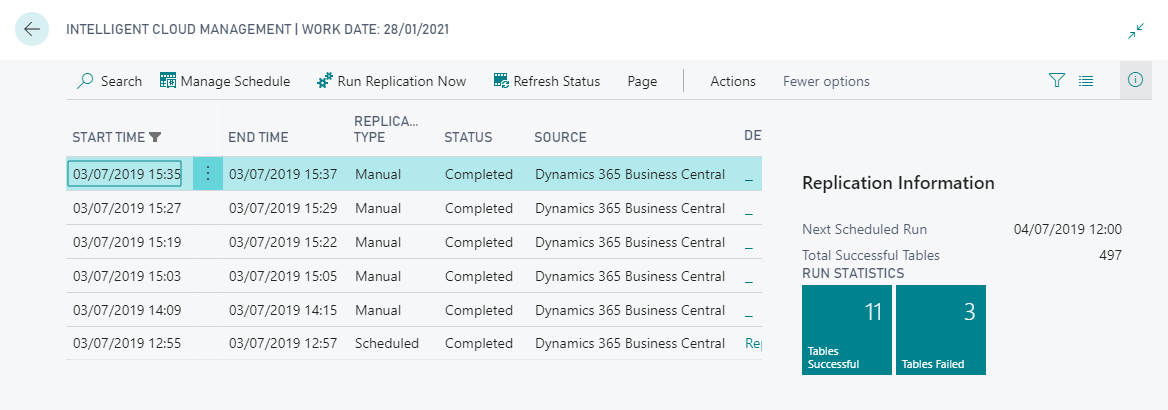
17 – Intelligent Cloud Management – Run Replication Now
This process would replicate data from Business Central On-Premises to Business Central On Cloud.

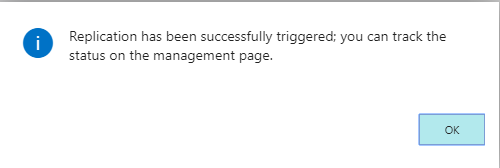
18 – Replication Triggered Successfully
19 – Replication Results
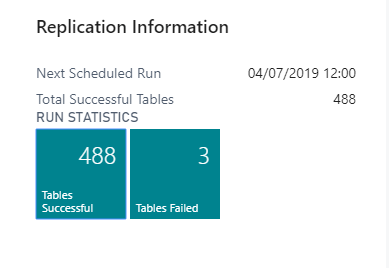
20 – Replication Statistics
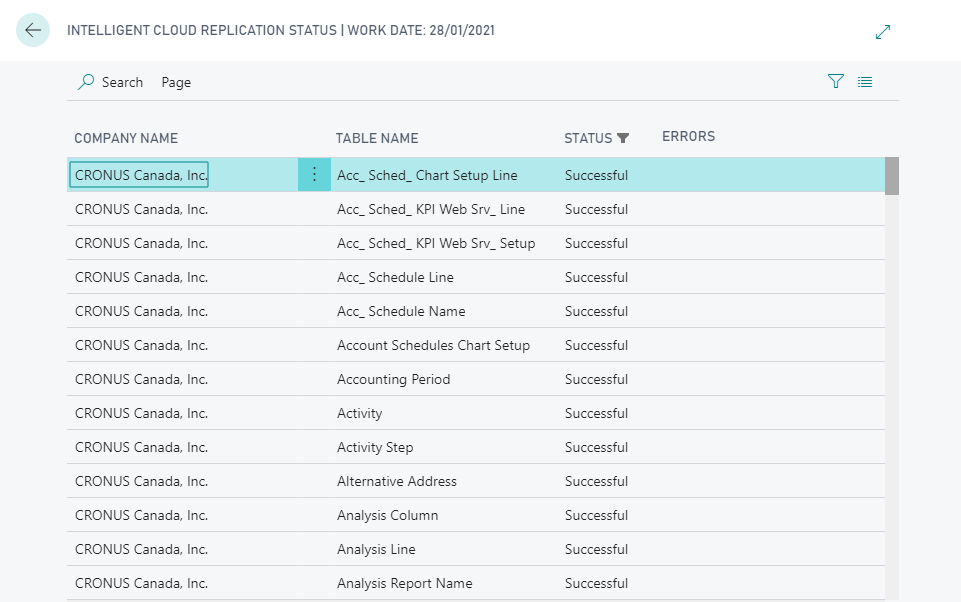
21 – Replication Status Information Data Replicated Successfully.
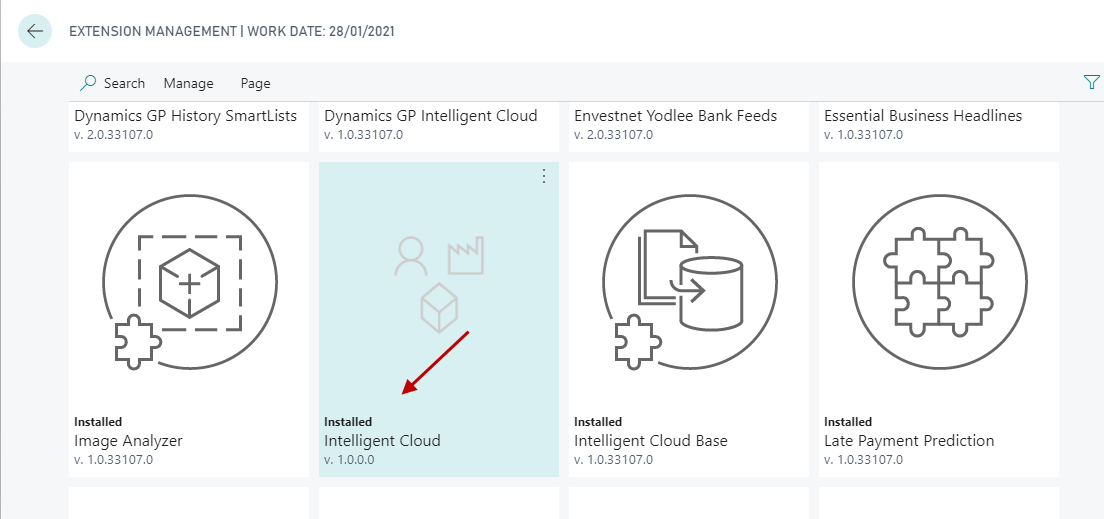
22 – Extension – Business Central On-Premises – Item Table
Now we have created a simple Extension extending Item Table and created a new Custom Table in On-Premises Environment. We have a sample data for same in On-Premises Environment.

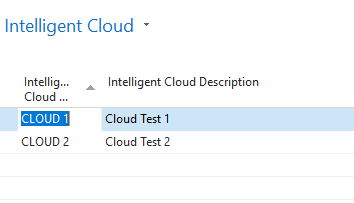
23 – Extension – Business Central On-Premises – Custom – Intelligent Cloud Table
24 – Extension – Business Central – On Cloud
We have installed the same Extension created above in Business Central On Cloud Environment.
25 – Run Replication – On Cloud
Now as the same Extension is installed in Business Central On-Premises and Business Central On Cloud, this process would replicate data for the same.

26 – Replication Completed Successfully
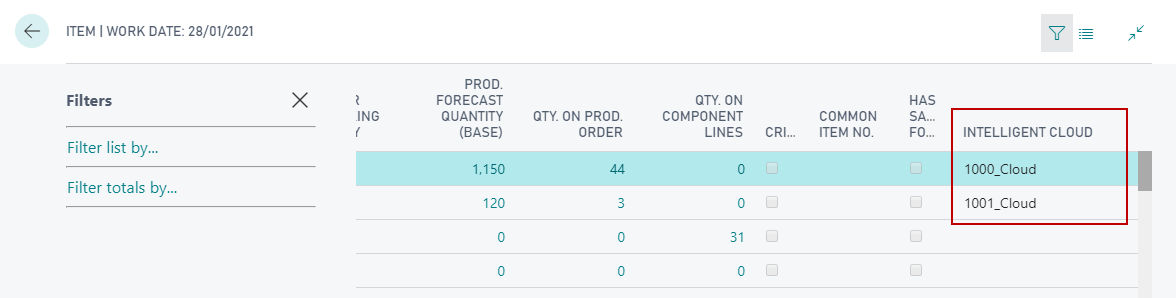
27 – Data – Item Table – Business Central On Cloud
28 – Data – Custom Intelligent Cloud Table – Business Central On Cloud
This is it! You have successfully migrated your data to Cloud. If you still have the questions or confusion then feel free to reach out to us at sales@intech-systems.com
*This blog was originally posted here.
**Reference: https://docs.microsoft.com/en-us/dynamics365/business-central/dev-itpro/administration/about-intelligent-edge
About Intech
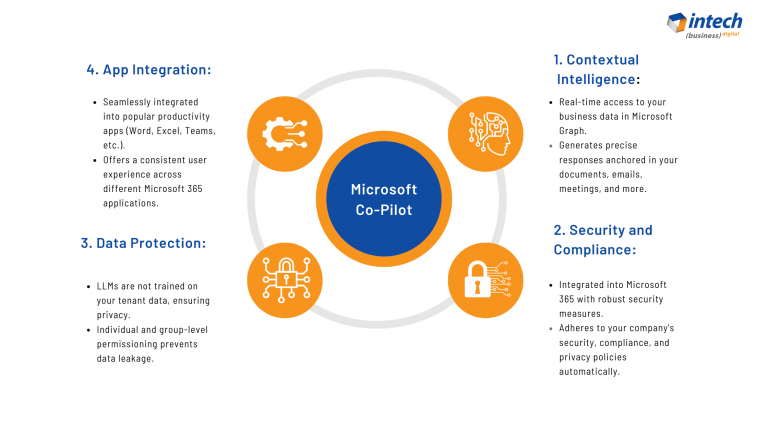
Intech Systems is a three-cloud Microsoft-certified partner that boasts deep expertise in providing digital transformation solutions for organizations by leveraging the Microsoft 365, Dynamics 365, and Azure solution stack. Intech is recognized as a top-tier Microsoft implementation partner globally and specializes in transformative technology solutions such as ERP (Enterprise Resource Planning), CRM (Customer Relationship Management), Business Process Automation, Business Intelligence, Cloud Infrastructure, Data Management, Productivity & Collaboration and Generative AI (Gen-AI) solutions. As a trusted Microsoft Solutions Partner, we are capable of doing complex technology implementations catered to an organization’s specific needs & also rapid solution implementation such as our Microsoft Dynamics 365 Business Central implementation packages. We pair our implementations with end-to-end customer support, offshore development & 3rd party integrations. With offices in India, USA (United States of America), and Singapore, we work with clients across globe to empower businesses with cutting-edge technology solutions. Our latest services aim at delivering business ready AI solutions to the customer, like our Microsoft Copilot Consulting Services & Solutions for small, medium & large enterprises. Intech’s expertise lies in building software solutions for Manufacturing, Professional Services & Healthcare. Our Dealer Management System, Sales and Service CRM for Manufacturing, Field Force Automation for Pharmaceuticals and Manufacturing Central are some of our leading industry solutions. Intech’s vision is to catalyze digital futures for operation-centric industries globally, we are at the forefront of innovation, helping organizations drive growth and innovation like never before. Contact Us to learn more.
About the Author

Frequently Asked Questions
Assess current setup, map data and customizations, upgrade/customize with AL extensions, prepare a cloud-compatible data model, export/import data, deploy through extensions in a Business Central cloud tenant, and validate.
Yes. Use data upgrade/migration tools and the Extension-based approach to adjust data structures as needed, then load data into the cloud environment while tests ensure integrity.
It’s recommended to align with a supported cloud release. In many cases you upgrade on-prem instances to a supported version first, then migrate to cloud to minimize gaps.
Use encrypted data transfer, apply data validation, map data types to cloud schema, run test migrations, and perform reconciliation to ensure data integrity post-migration.
Align with Azure AD for authentication, configure tenant permissions, assign appropriate roles to users, and ensure data access follows least privilege. Review OAUTH/Tenant security as needed.
Related Posts

5 technology trends impacting packaging industry
Technological shifts are a blessing for the packaging industry. These following 5 technology trends have made packaging a cost-effective and less time-consuming task. How have these…
